
Step by step to DIY a personalized GH60 programmable mechanical keyboard
This topic teaches you how to DIY a GH60 programmable mechanical keyboard for your private use.
We’ve introduced GH60 programmable mechanical keyboard in 2 released topics:
GH60, a personalized DIY mechanical keyboard, professional player’s choice
and
GH60, a DIY mechanical keyboard, professional player’s choice–Part 2(continued)
In this topic, we will introduce some skills of DIY a GH60 programmable mechanical keyboard step by step, beginners may read some experience here to reduce errors and avoid detours.
All the needed for DIY a GH60 mechanical keyboard
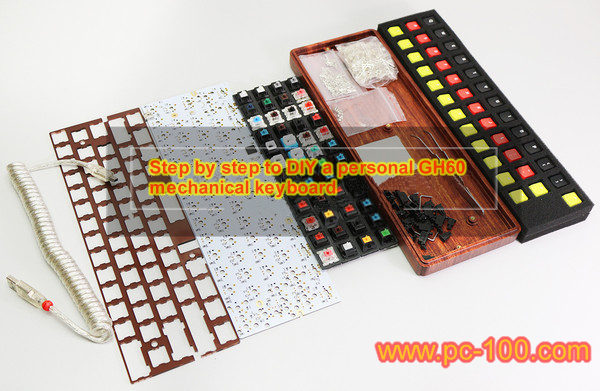
Step by step to diy a personalized GH60 mechanical keyboard
Components needed
Keyboard base, PCB, switches, keycaps USB cable and switch balance auxiliaries (stabilizer springs, seller may provide balance auxiliaries when sell you the keyboard PCB), fixed screws and cushions may be bought with the keyboard base. As to positioning board and LED lamps, they are optional.
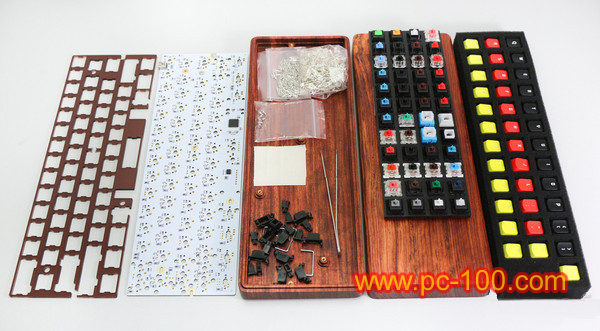
All components needed for DIY a GH 60 programmable mechanical keyboard
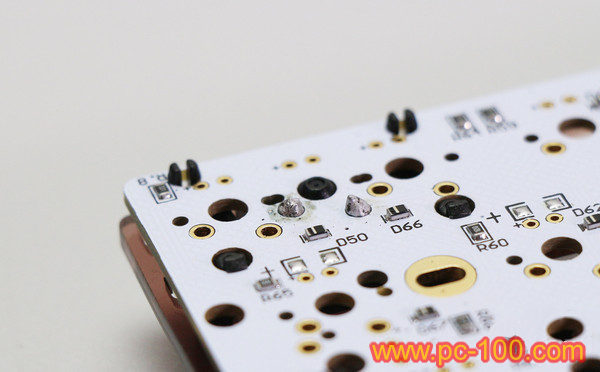
Keyboard PCB
PCB is crucial to a GH60 keyboard, you should ask these questions yourself before buying a GH60 PCB:
i)Do you need LED lamps on the keyboard?
ii)Do you need a switch pull-and-plug PCB?
iii)The layout of your GH60 keyboard.
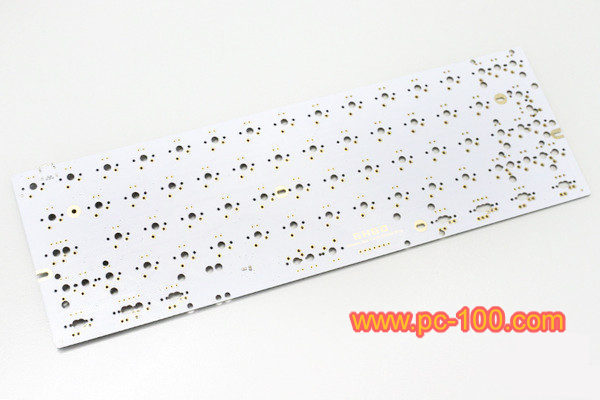
A GH 60 mechanical keyboard PCB
Keyboard switches
There are many types of switches for Gh60 mechanical keyboard, may be a switch tester can help you test the tactile feel of a switch and choose your switch-combination experiencedly.

A switch tester for mechanical keyboard
If you didn’t have experience of switches, Cherry switches are tested to be the best switches by most users but are at the most expensive price, Cherry switches are with 3 pins or 5 pins, 5-pin Cherry switches are seldom found in the retail market now, and also, PCB with 5-pin sockets is not popular on the market. If you didn’t accept the expensive price of Cherry, Kailh, Gateron or Huano, Greetech can be for your choice too.

mechanical switches for mechanical keyboard
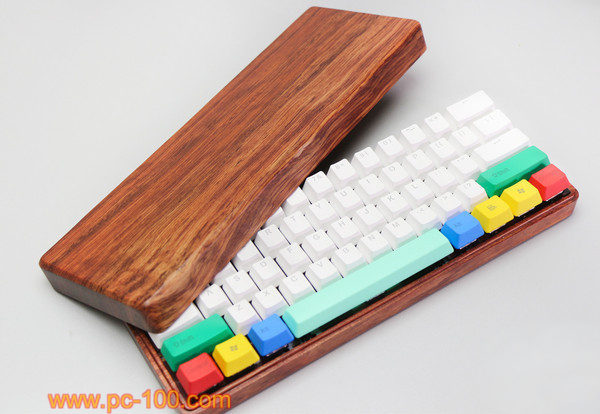
Keyboard base
Several materials for GH60 mechanical keyboard base, metal, plastic, wooden and so on. From my view, wooden means artistic, metal means means scientific while plastic means serious, popular plastic materials used to make keyboard base include PBT, ABS and acrylic.
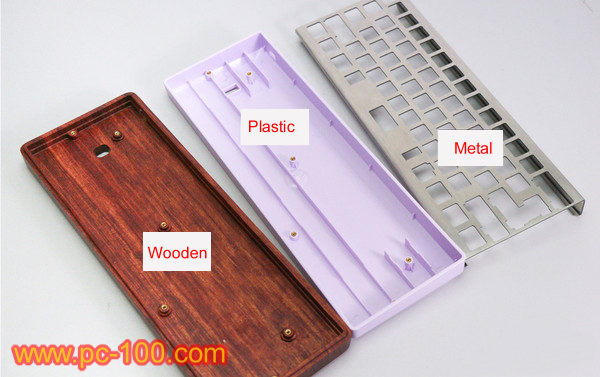
Keyboard base for GH 60 mechanical keyboard
Keycaps
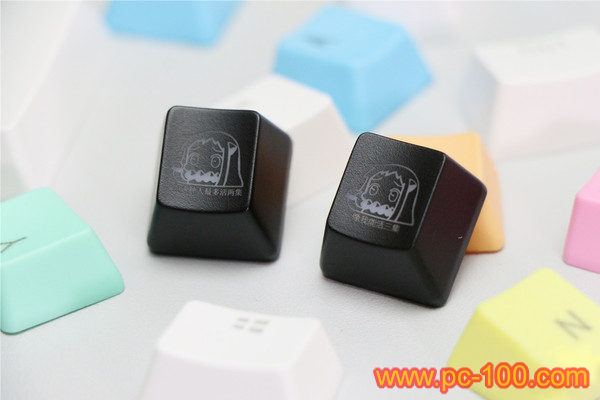
Personalized keycaps for GH60 mechanical keyboard
Connection cables

Mini USB port on the PCB of GH60 mechanical keyboard, some PCBs are with Type C port, you should buy your connection cable according to the connection port of your PCB
Positioning board

Positioning board for gh60 mechanical keyboard
Step by step to assemble a GH60 mechanical keyboard
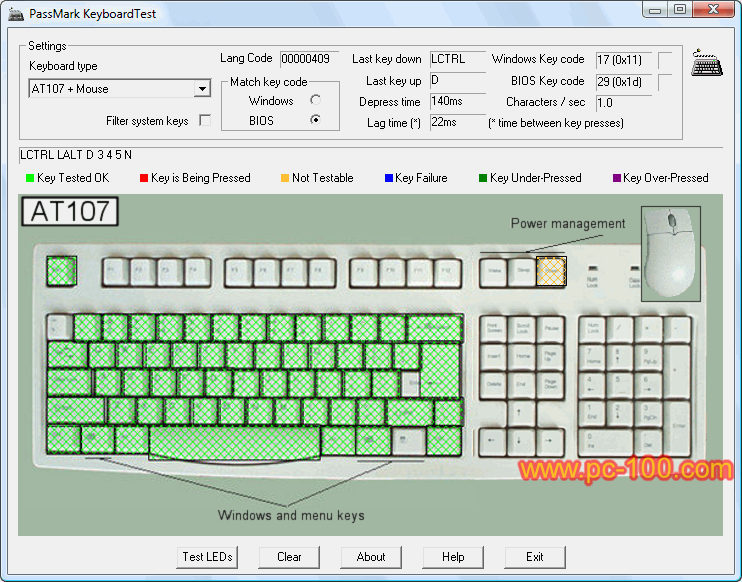
STEP 1: Test the PCB before beginning
Download and install “PassMark KeyboardTest” software in your PC and connect the PCB with your PC, use a metal tweezer to connect each pair of sockets, confirm no problem for all pairs of sockets.
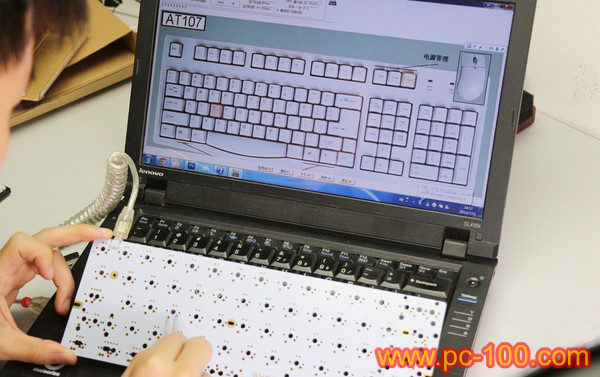
Test the PCB before beginning with DIY your Gh60 mechanical keyboard
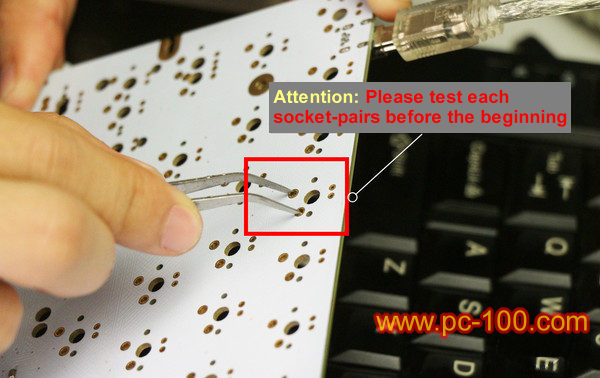
To test the socket-pairs in GH60 mechanical keyboard PCB
STEP 2:Assemble the stabilizer spring (switch balance auxiliary)
The stabilizer spring is with very simple structure, even a beginner may assemble it.
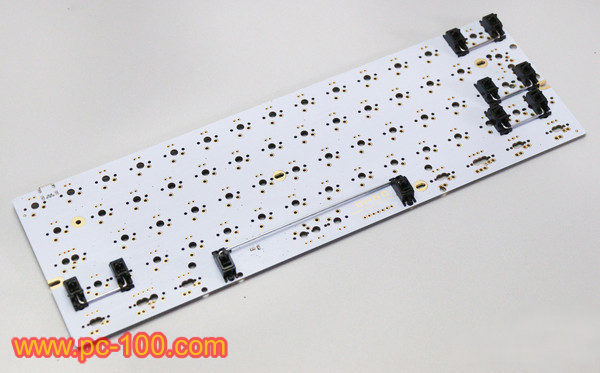
To Assemble the stabilizers to the PCB of GH60 mechanical keyboard
STEP 3:Fix the positioning board
Plug some switches at their typical positions, for example, on the boder or at the 4 corners, then fix the positioning board, then plugging switches would be very easy.
Fix the positioning board for GH60 mechanical keyboard
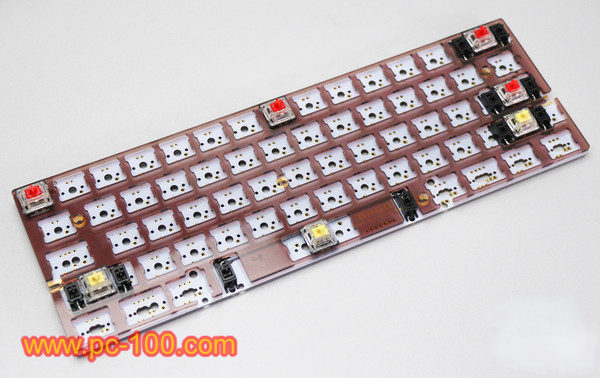
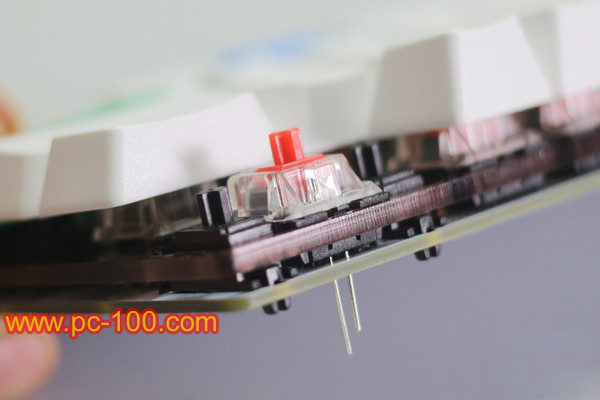
STEP 4: Plug the switches
When the positioning board was fixed, positioins for plugging switches was also confirmed, plug the switches on the first 4 lines firstly, the last line of switches include “Enter”, “Shift”, “Ctrl”, “Alt” and etc., some horizontal tolerances were deliberately designed for these keys’ positions to adapt to different size of key caps.

Plug the switches on the GH60 mechanical keyboard PCB
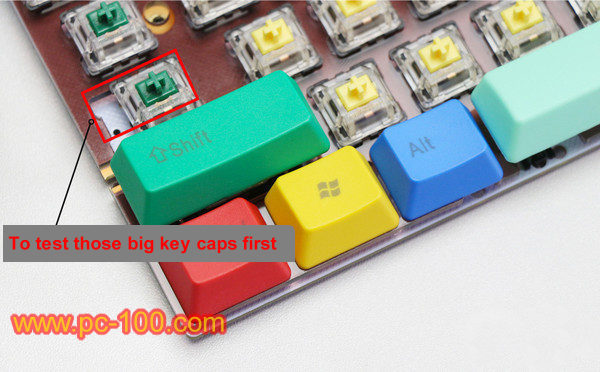
You may test the keycaps before soldering the switches to GH60 mechanical keyboard PCB
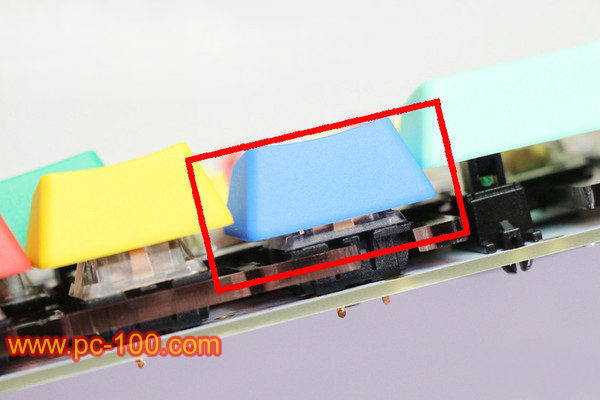
If you’ve bought the key caps, you may test the keycaps before soldering the switches, ensure no keycaps’ interference.
You may test the keycaps before soldering the switches to GH60 mechanical keyboard PCB
Confirmed no interference of keycaps, plug all switches, you may plug several types of switches on your GH60 mechanical keyboard according to your personal favorite.

All switches were plugged to the PCB of GH60 mechanical keyboard
STEP 5: Soldering switches on the PCB (If your PCB is with plug-and-play sockets for switches, just skip this step please!)
After all switches were plugged and switch-arrangement were confirmed, you may begin to soldering the switches to PCB. this is the most important
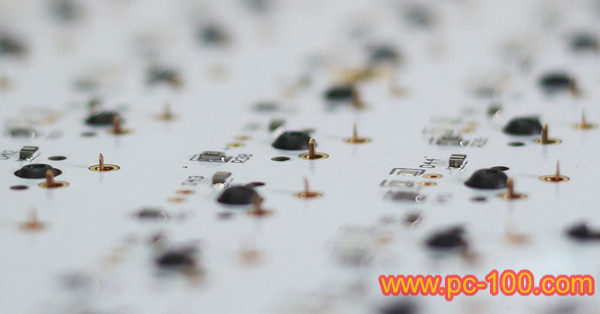
Solder switches on the PCB of gh60 mechanical keyboard
Solder switches on the PCB of gh60 mechanical keyboard
step to DIY a GH60 mechanical keyboard, pay attention to the following when soldering:
–Don’t heat a soldering point for long time, PCB may be damaged by long-time heating.
–Don’t welding too much or too little tin at a piont.
–Cone-shaped and enriched tin is a good quality welded point.
STEP 6:Check and test
Check that if there were some switch pins missed soldering or faulty soldered, then connect the keyboard with PC, press every key to test. If everything is OK, install the screws and keycaps.
Check and test soldered PCB of gh60 mechanical keyboard
A finished GH60 mechanical board with personalized components
Oh, some players may be interested in LED back light effects, there are some extra steps to be inserted into above steps:
STEP 0: Something should be confirmed before buy GH60 keyboard components
You must know if the PCB support LED back light effects, which kind of LED lamps are supported? (you must take PCB controller in to account and ensure the stability of power supply for the LED lamps).

Confirm if the PCB support LED light effects or not
STEP 4-2 LED lamp arrangement
If your PCB support RGB back light and support progammmable backlight effects, you may just skip this step. Otherwise, you may design your LED color arrangement before soldering LED lamps.
Please pay attention to positive pin and negative pin when plugging the LED lamps, generally, the longer pin is positive and should be soldered to “+” on the back of PCB, you may connect the PCB with a PC to test if all LED were correctly plugged.
LED for gh60 mechanical keyboard
STEP 4-3 Solder the LEDs to PCB
Disconnect the PCB with PC, begin to welding.
Tips: Use your left hand to hold a pin (e.g.positive pin ) and solder wire, soldering iron was hold by right hand and hold onto another pin (e.g.negative pin ), left hand approach solder wire to the soldering iron to finish welding negative pin, then change to weld positive pin.
Check welding defects after all LED lamps were soldered, then trim off extra parts of the LED pins.

Solder LEDs to gh60 mechanical keyboard PCB
