Macro function for mechanical keyboard
“Macro” is a great function in our mechanical keyboard driver tool, with “Macro” you may set some shortcut keys for playing any
games.
A) Import a Macro
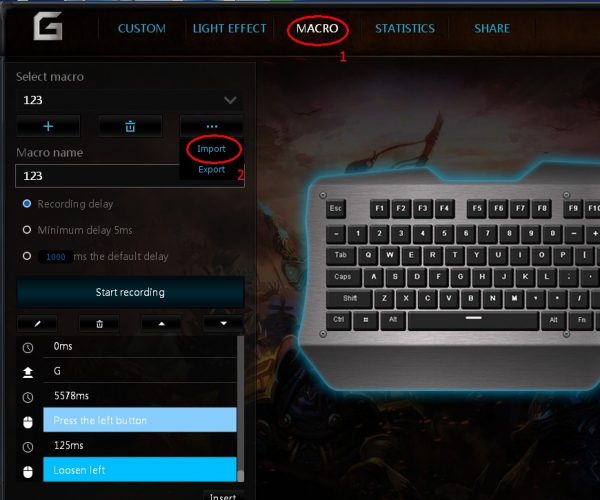
- 1. Click “Macro” label on the top of mechanical keyboard driver tool software.
- 2. Click “…” to show a menu, then click “import”
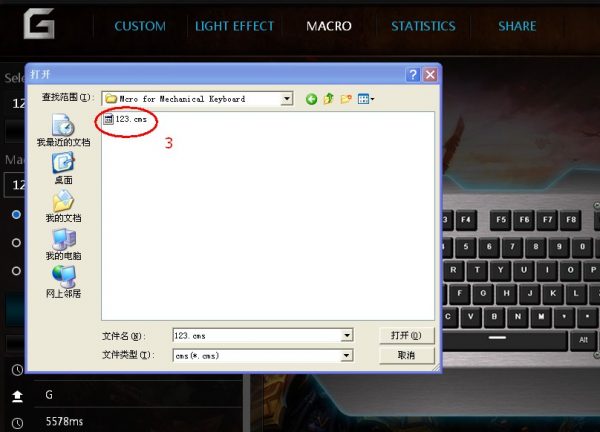
- 3. There pops up a dialog box for you to select an existing Macro file (with file extention “.cms”).
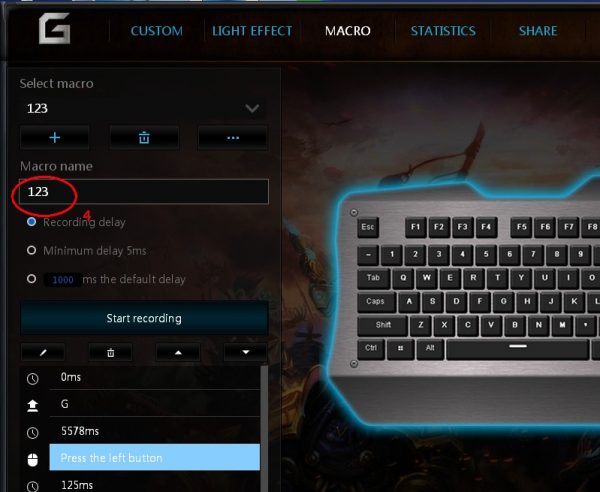
- 4.Macro will show on the driver tools after the macro was imported.
B)Export a Macro
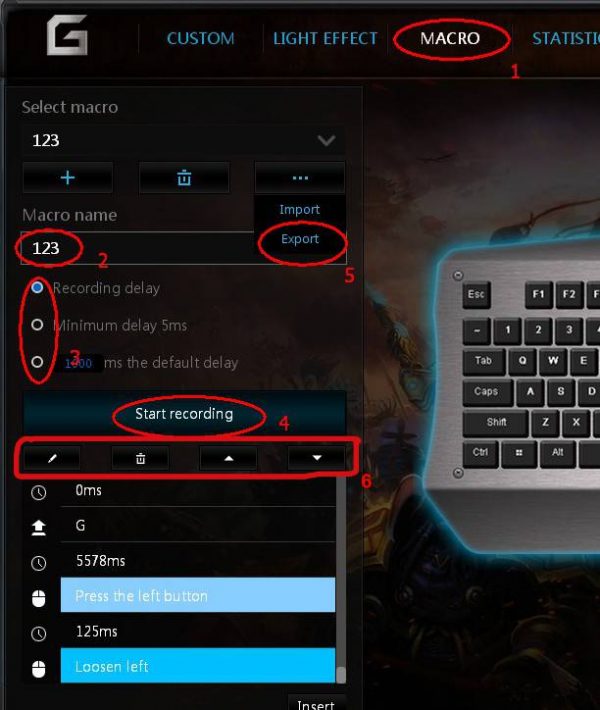
- 1. Click “Macro” label on the top of mechanical keyboard driver tool software.
- 2. Input a name for the macro.
- 3. You may choose the macro recording parameter.
- 4. Press “Start recording” to record the macro (once the “Start recording” was clicked, your actions of typing keys would be recorded)
- 5.Once the recording is finished, you may click “export” to save the macro into your pointed file folder.
- 6.On the other hand, when you need to modify the key-actions after recording finished, you may use these edit menus to modify the actions in the macro, such as “delete”, “move up” or “move down”…
You may share your macros with your friends who also play with our mechanical keyboard produts.
C)How to use a macro for your mechanical keyboard?
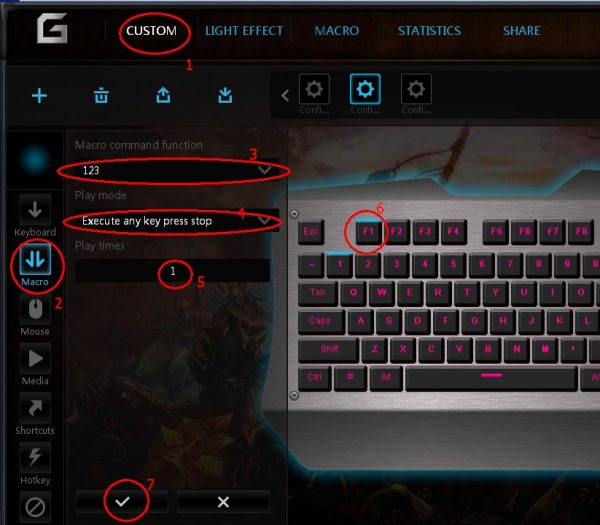
Binding a macro with a key on RGB mechanical keyboard, a shortcut to execute macro, it’s so great when gaming!
- 1. Click “Macro” label on the top of mechanical keyboard driver tool software.
- 2. Click “Macro” label on the left column of mechanical keyboard driver tool software.
- 3. Click to select the existing macro.
- 4. Click to select “Play mode”,
- 5. Input a number to set “Play times”.
- 6. Select a key to binding to the selected macro (e.g. click “F1” key, “F1” key on the driver tool software will change its color to show it was selected).
- 7. Click“√”and “Apply” to save.
Thus, the macro will be executed when press the key “F1”, this is so great function when gaming!
Related Reading:
Media Settings in Mechanical Keyboard Driver Software

